In this article we will walk you through a simple installation of Google Analytics in WordPress starting with the creation of your first Google Analytics account. A Google Analytics account can be used for 100 properties and each property can have multiple data streams (you may want to regroup data from multiple sites in one property or regroup data from web sites and mobile apps). You can create and have access to multiple accounts.
If you have one web site, a blog on WordPress for example, then you will need just one Google Analytics account, one property and one data stream. A tag is provided for every data stream, you install this on every page of your site. For WordPress sites you can do this using a plugin (SEOPress Free for example) or by adding code to the theme.
Before July 2023, Google Analytics accounts can have both GA4 and Universal Analytics properties. We will be looking exclusively at the creation and installation of Google Analytics 4 (GA4) properties.
By creating your own Google Analytics account, you will be able to invite other users to access reports, giving them levels of access using roles and data restrictions.
If you already have a Google Analytics 4 property, you may want to jump to the section “Installing Google Analytics on WordPress using SEOPress”.
Create a Google account
Before heading off to Google Analytics, you will need to create a Google account if you do not already have one – or decide which Google account you want to use for Analytics if you have more than one. Google accounts are used on Android phones and to access tools such as YouTube, Google Drive, Google Docs and Google Meet.
It is a common misconception that you need to create a Gmail account to access Google’s services. When creating a Google Account (https://www.google.com/account/about/) you can choose the option “Use my current email address instead” to use another email address and skip the creation of a Gmail account.
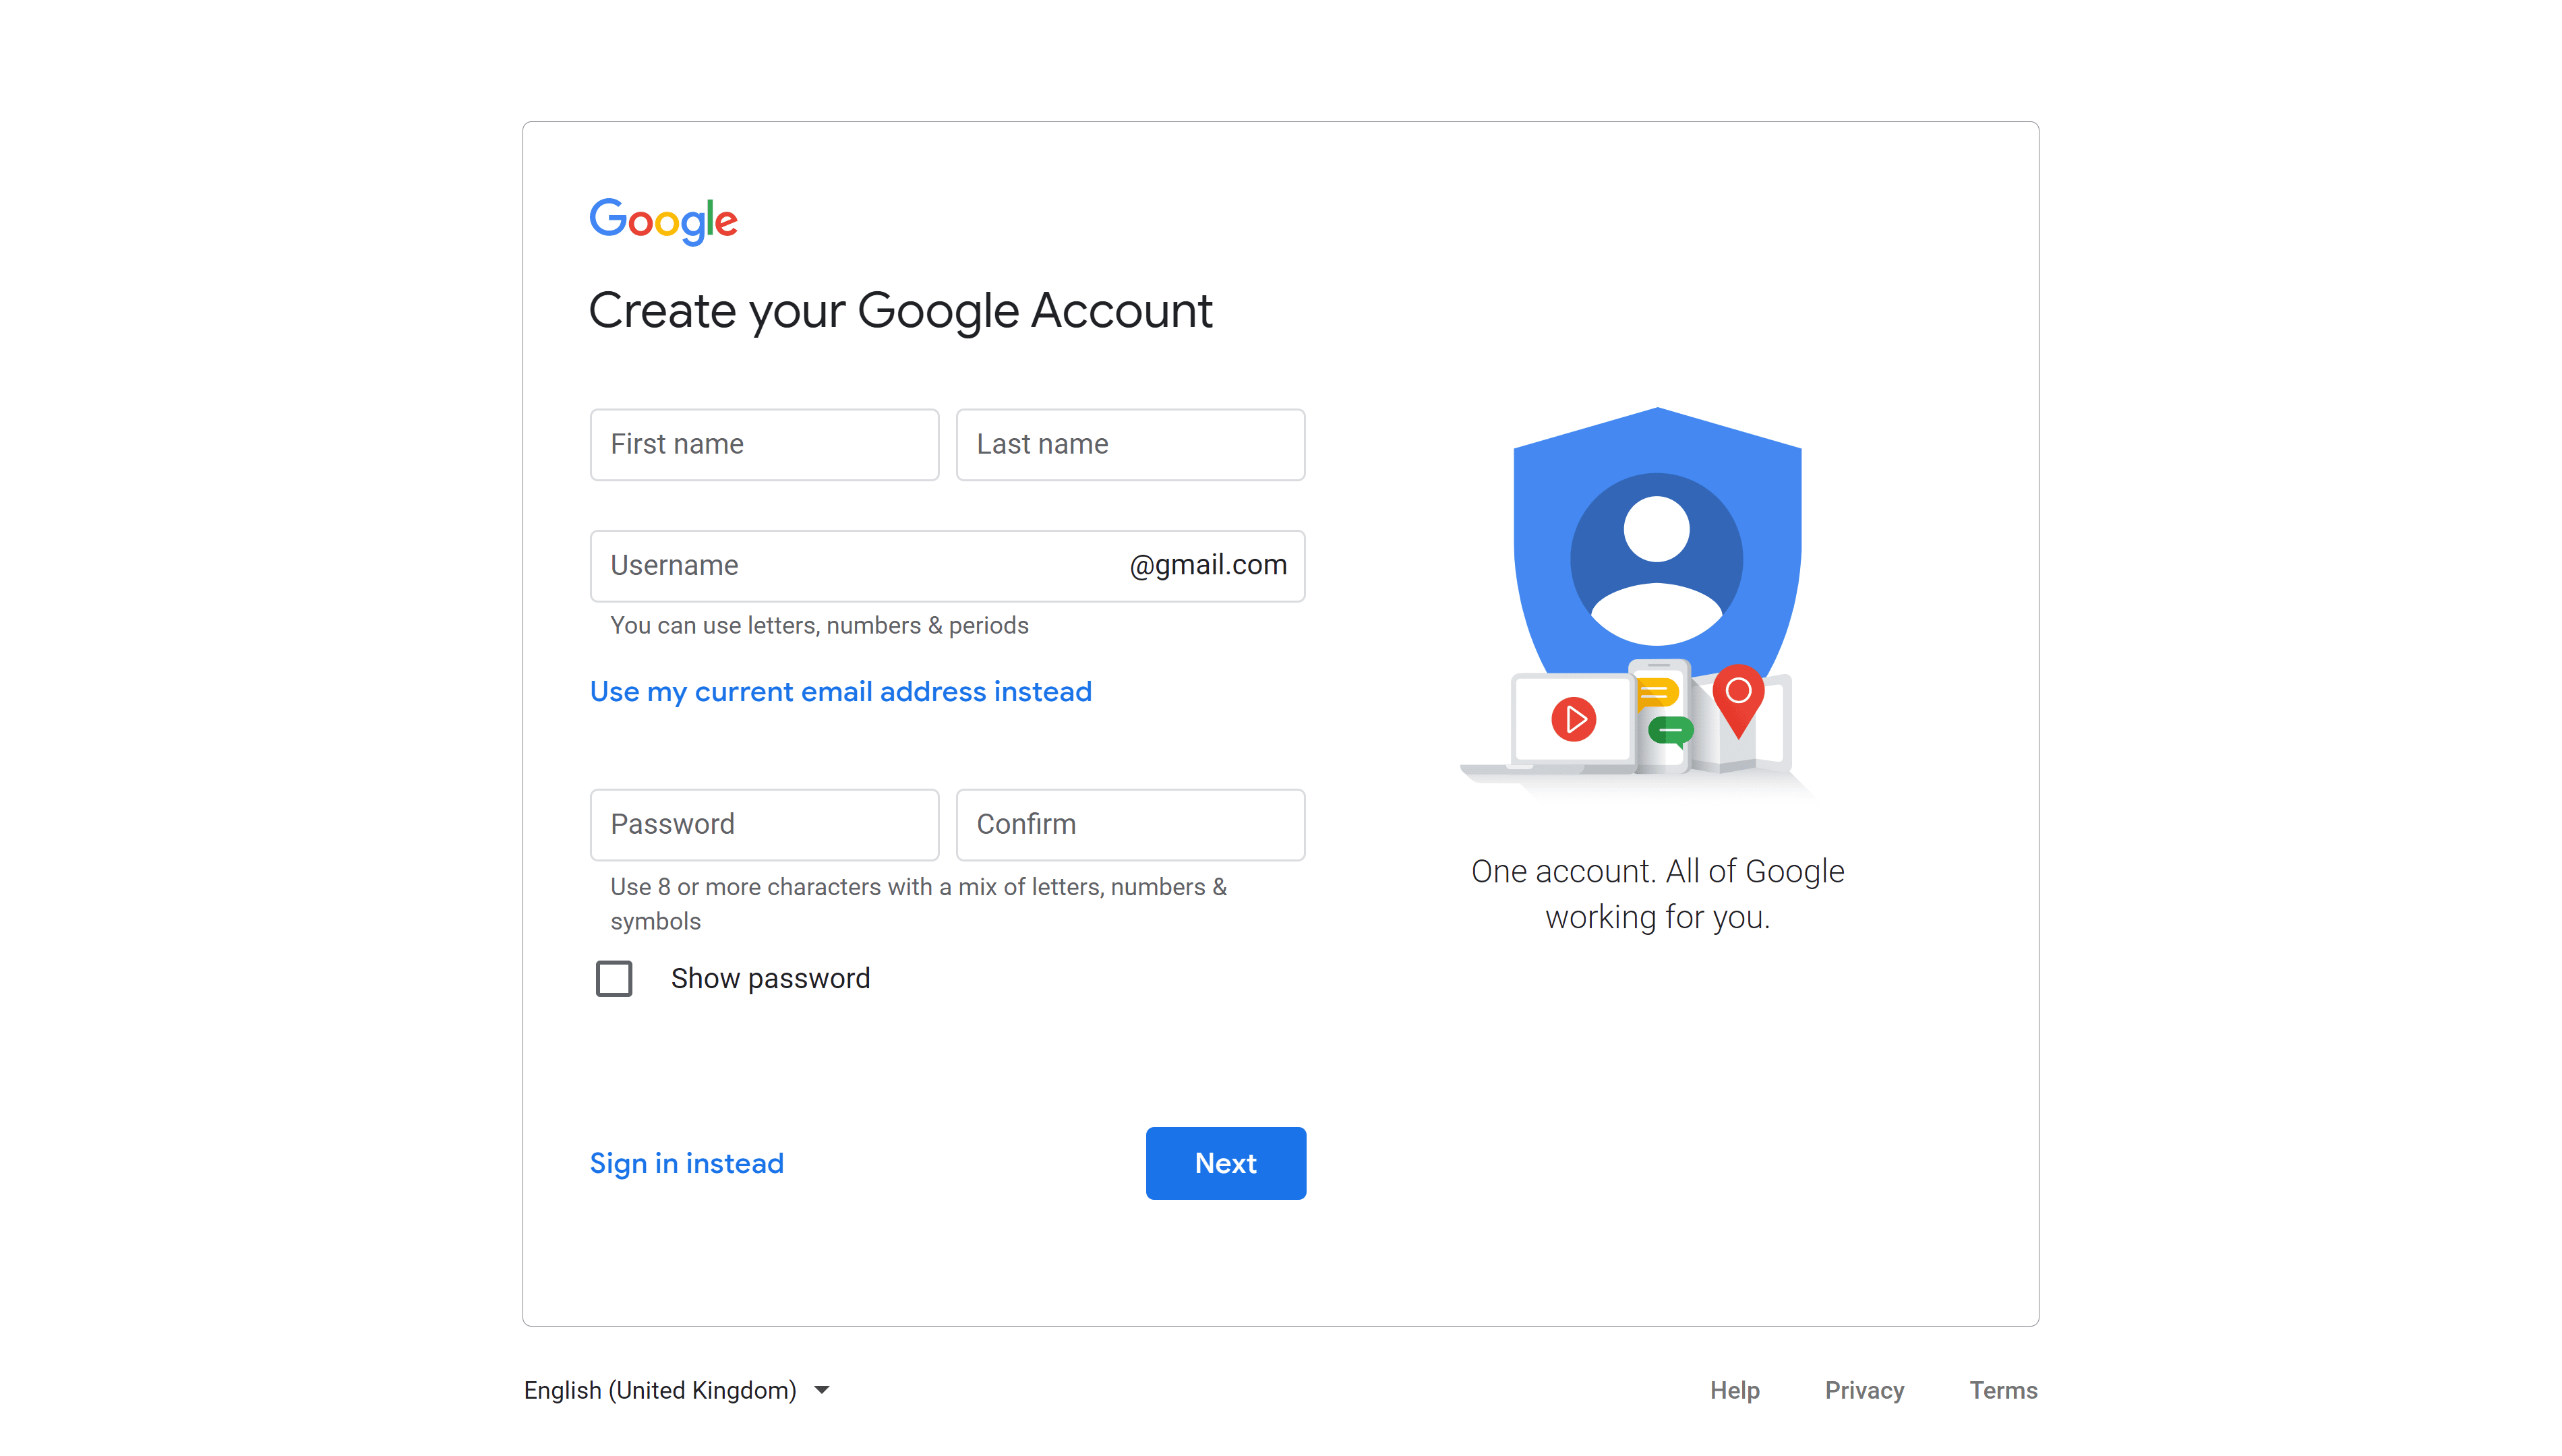
You can use a professional email address that uses your domain name or an address from another email provider such as hotmail.com or aol.com. Be aware that your Google account password will be different from your email password (unless you decide to use the same one for both).
Create your Google Analytics account
Once you have created and logged into your Google account you can head over to the Google Analytics web site (https://analytics.google.com/). If you don’t already have a Google Analytics account, you will see this landing page.

Click on “Start measuring” and you will be prompted to choose an Account name. If you work for a company, you can use your company name here.
You be prompted on a second screen for a Property name. This corresponds to the web site that you want to track. You can simply write the name of the site, but frequently users write the name of the site in the format of the website address. For example, www.seopress.org.
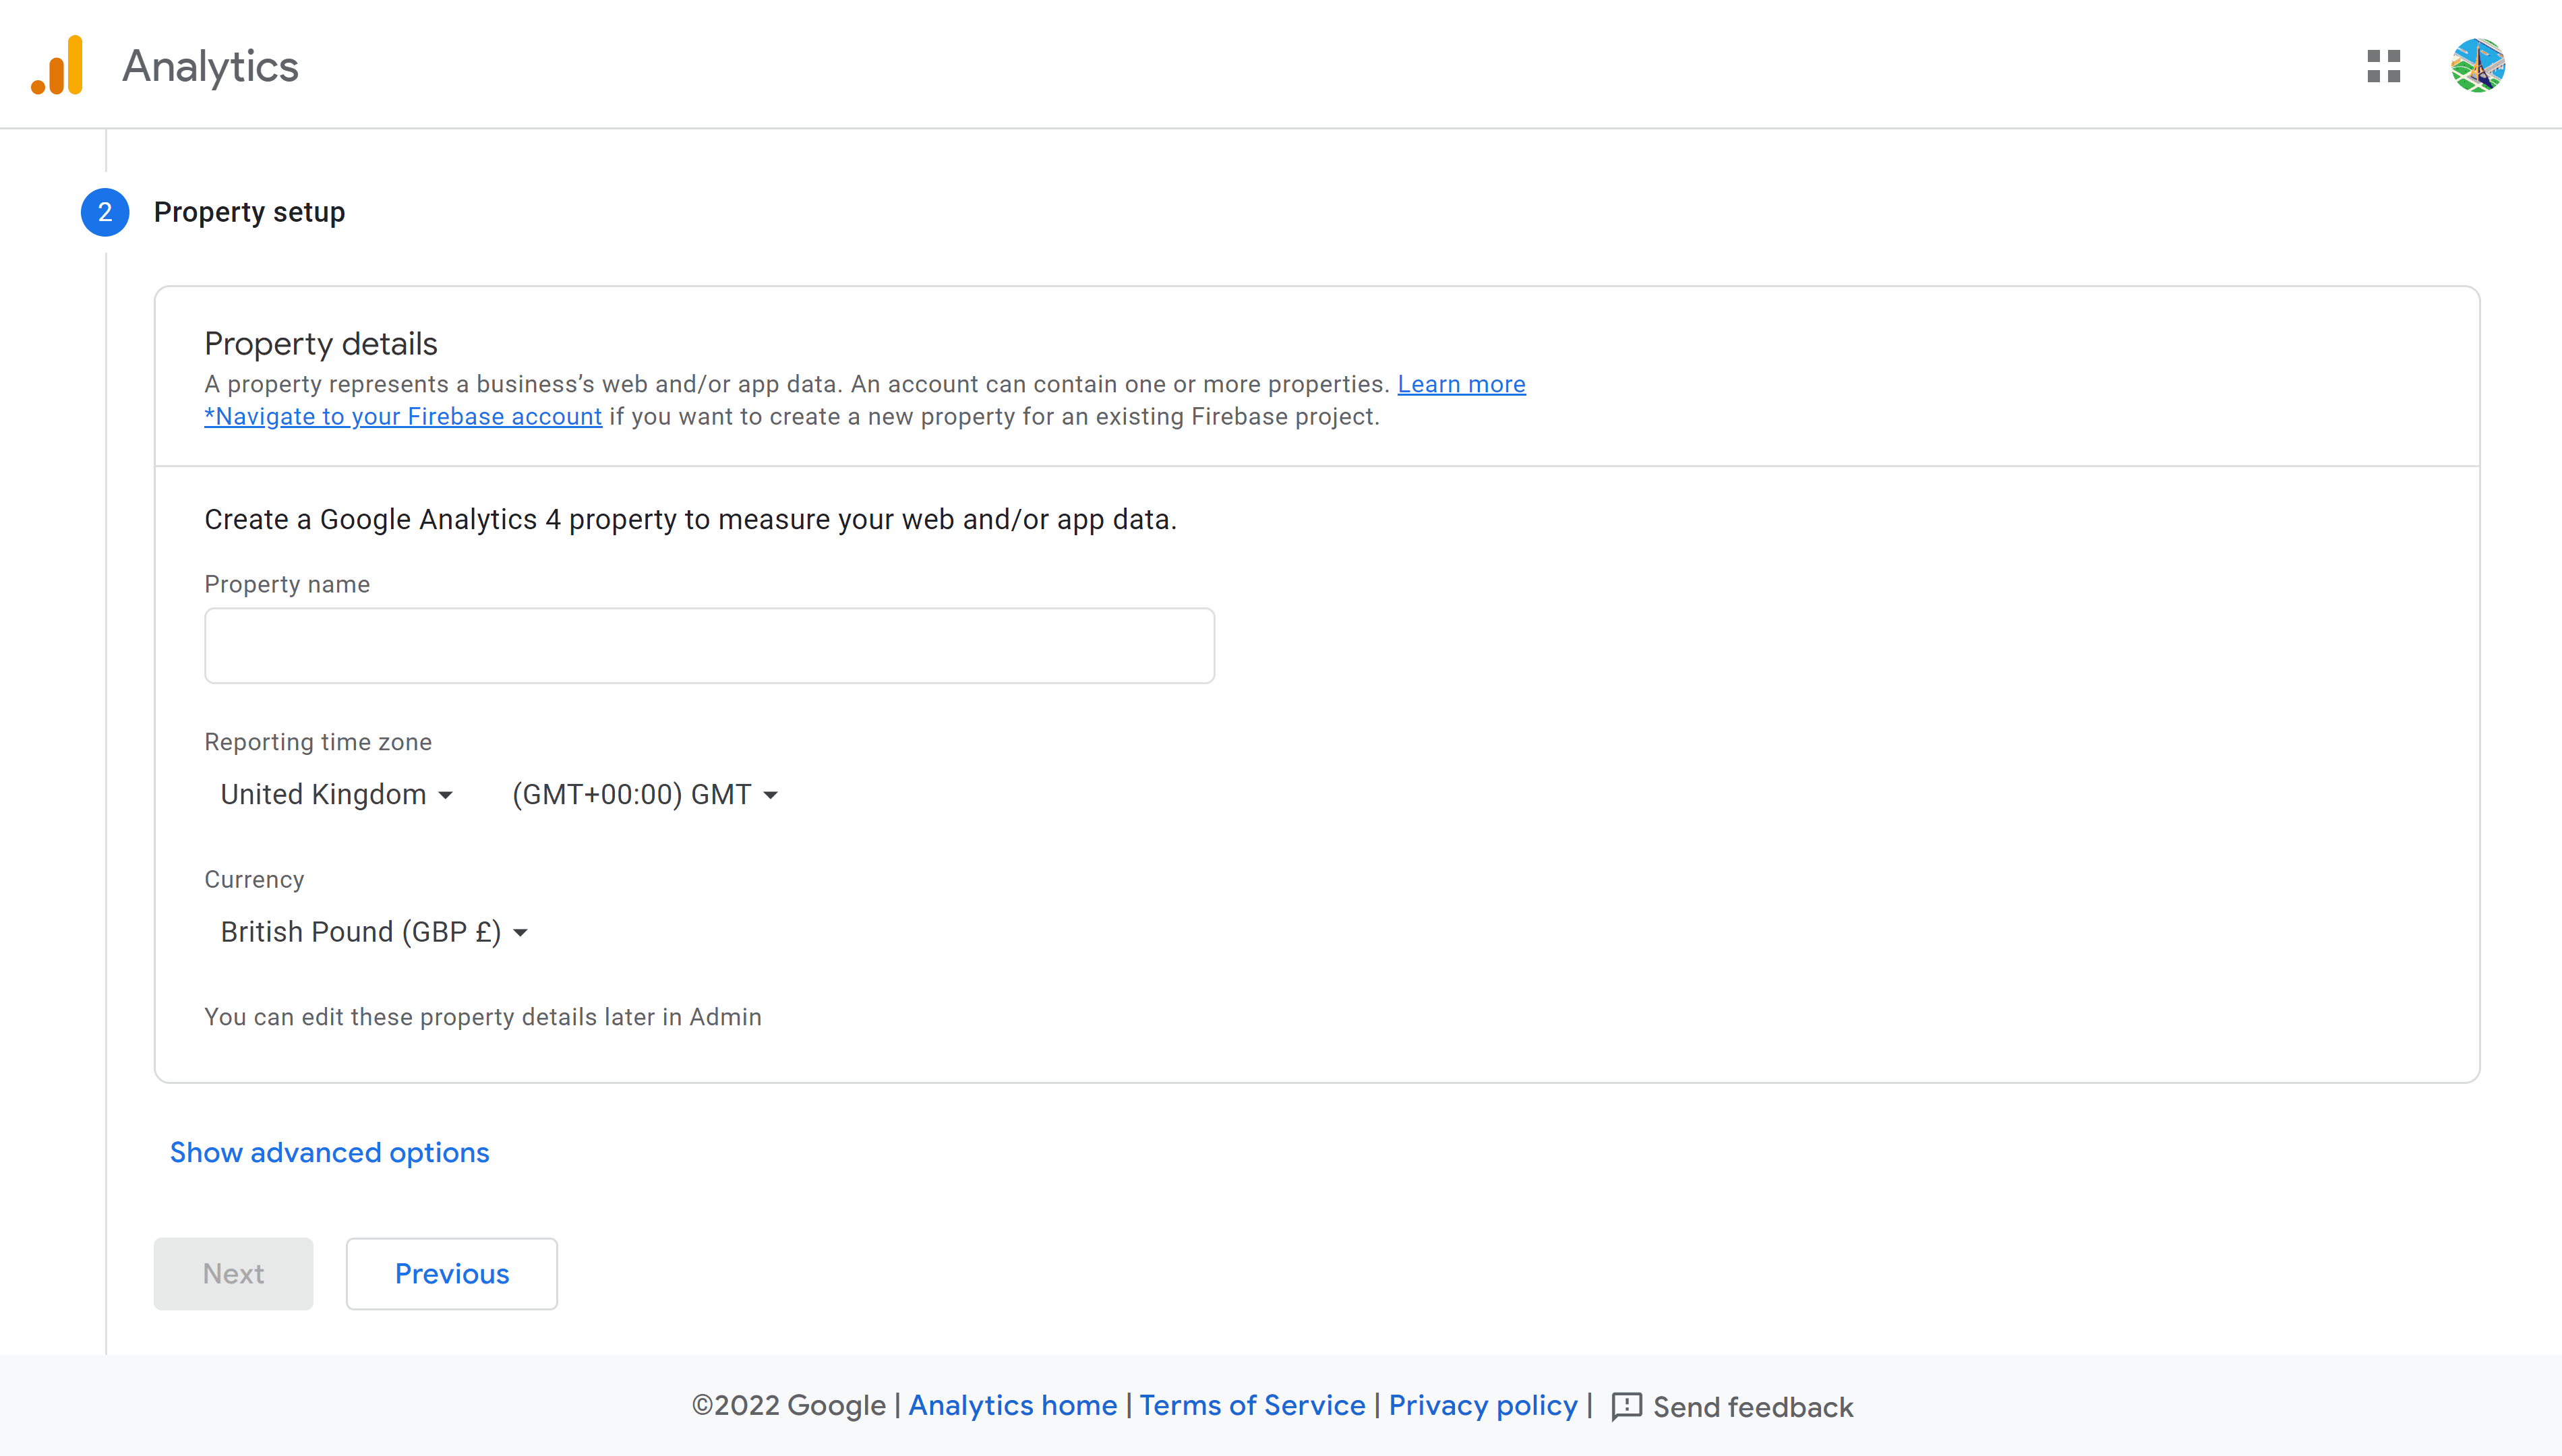
Pay attention on this screen as it is important to choose the correct country and reporting time zone for your site. Choose the time zone from which you will be analyzing the data about your visitors – visits will be reported using this time zone, not their time zones.
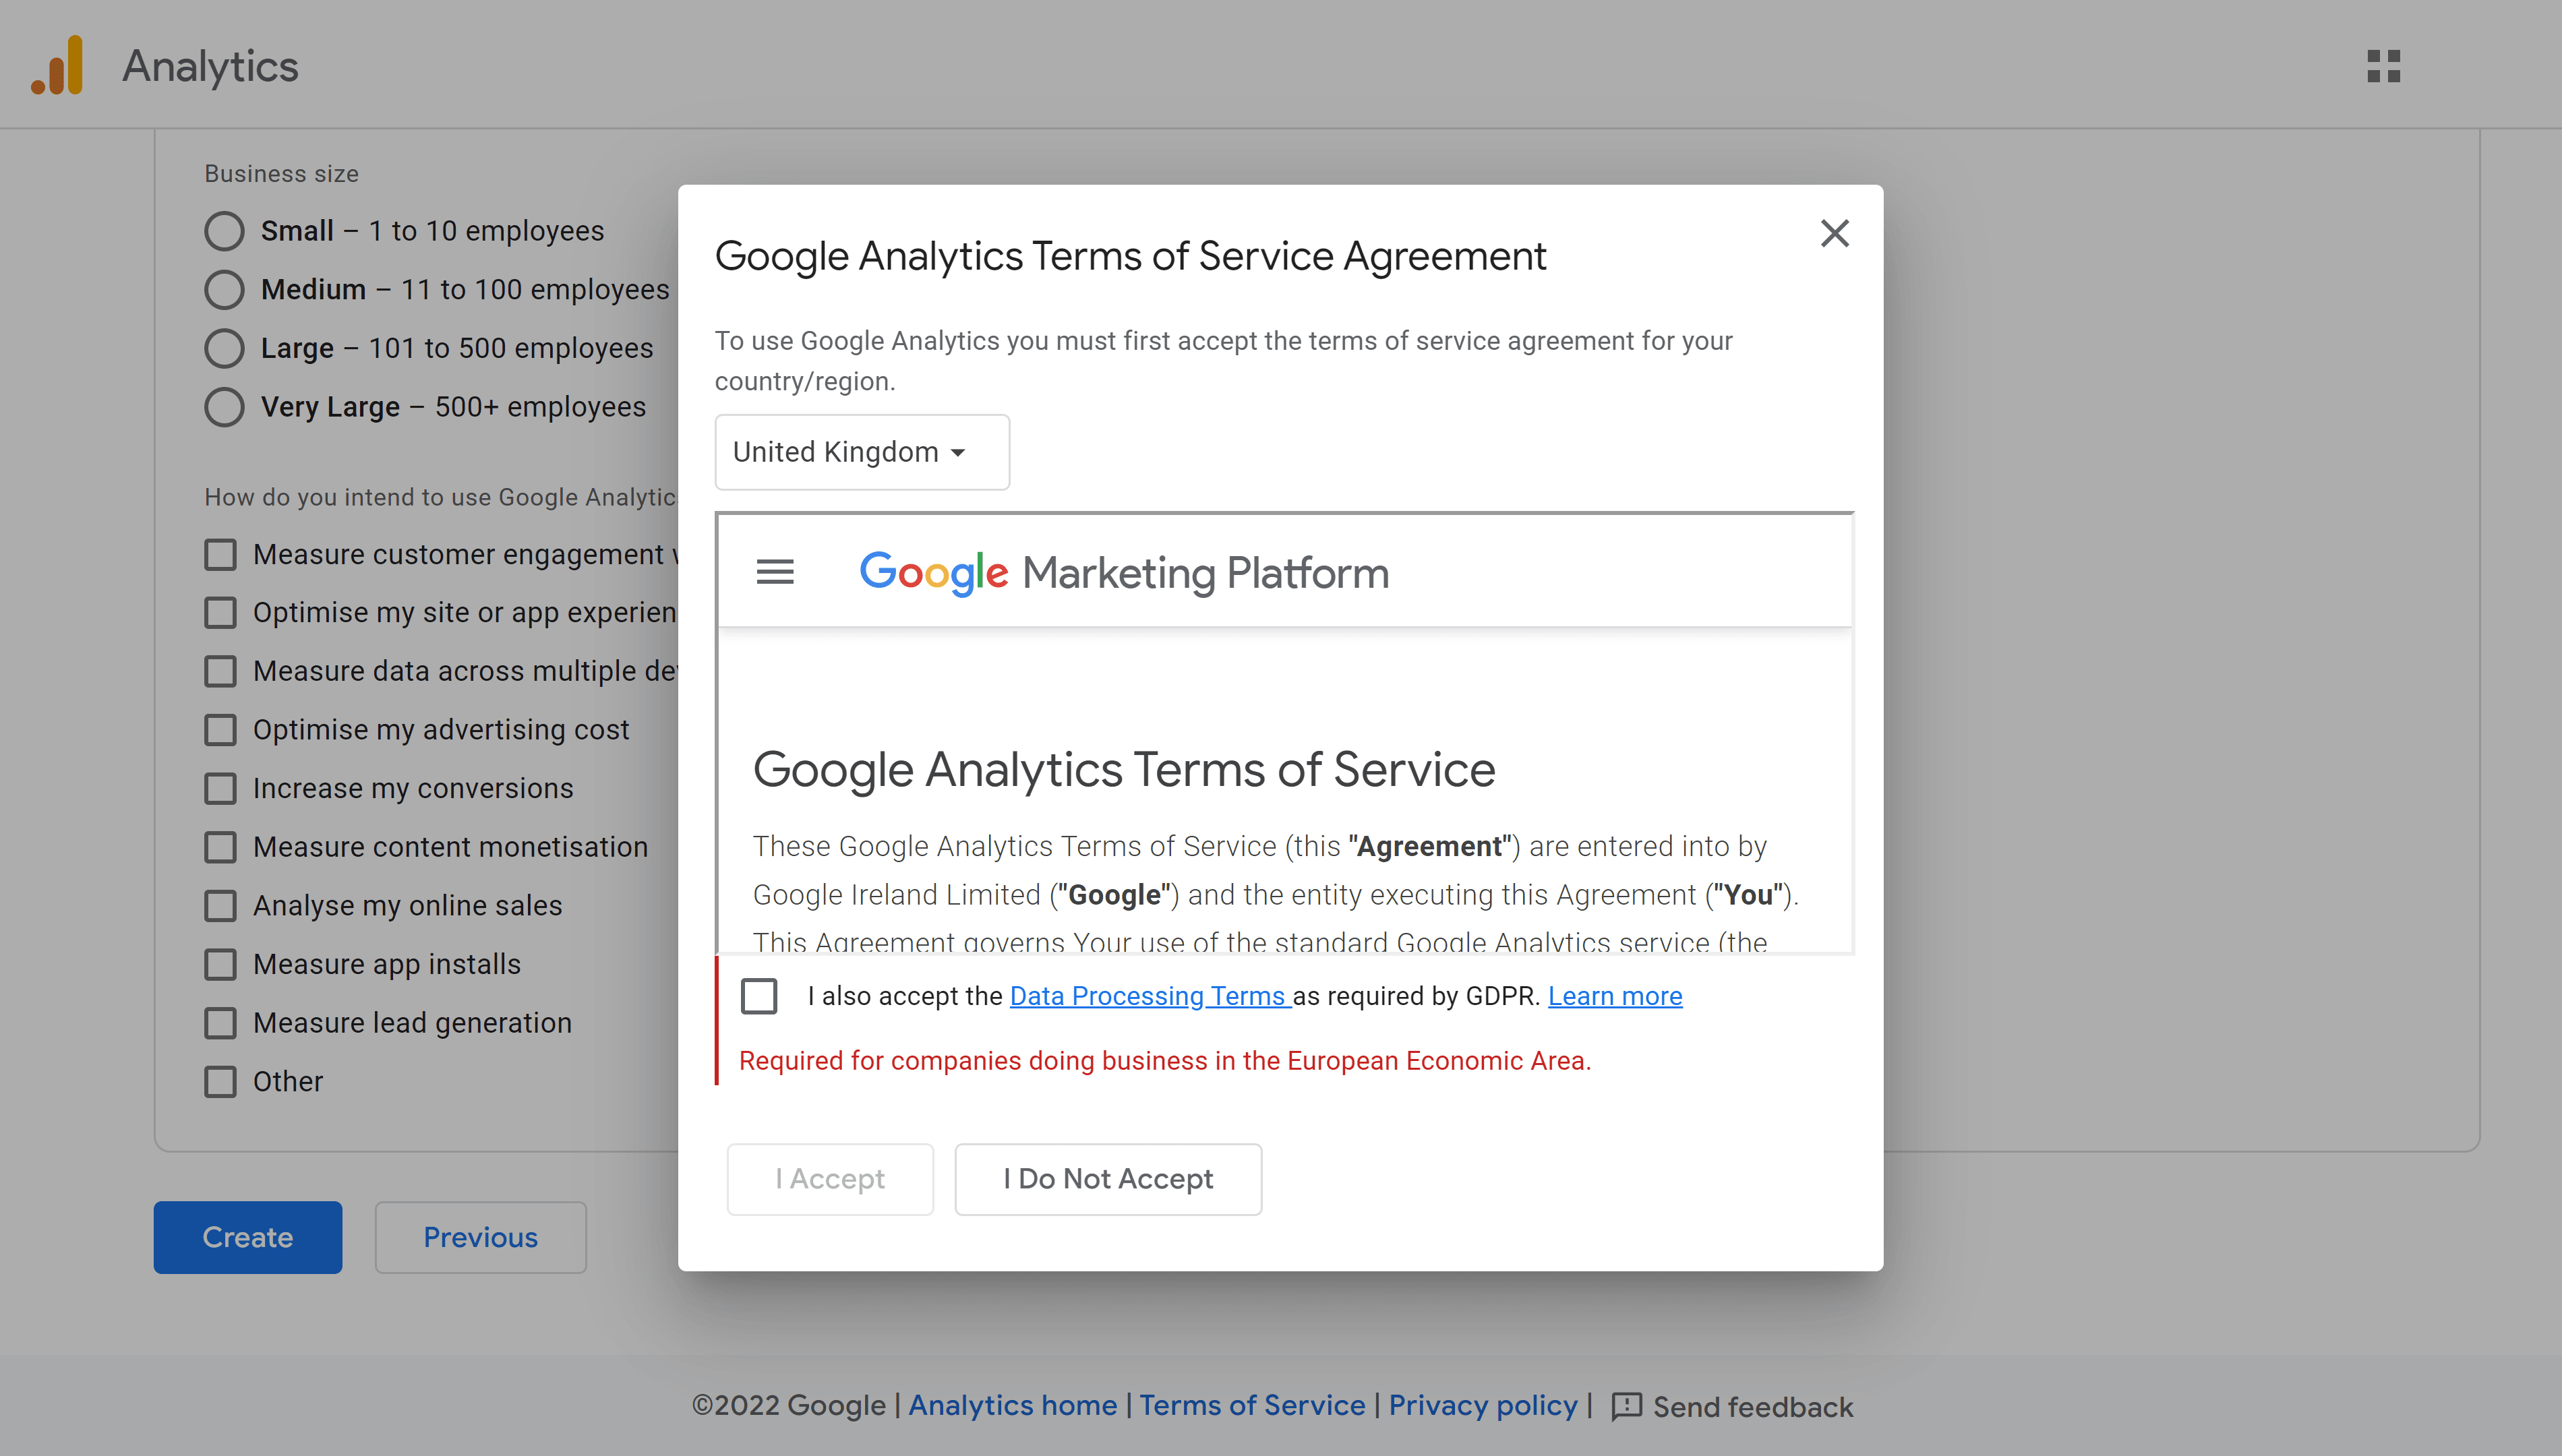
Depending on your country and the laws on data protection, you may also need to pay particular attention to the Google Analytics Terms of Service Agreement that you are required to accept in order to create the account.
Once you accept the Terms of service, you will arrive directly in the Property Data Streams page of the Admin section. If you need to come back to this page, click on the Gear icon at the bottom of the screen and then under the Property column, make sure that the correct property is selected and then click on Data Streams.
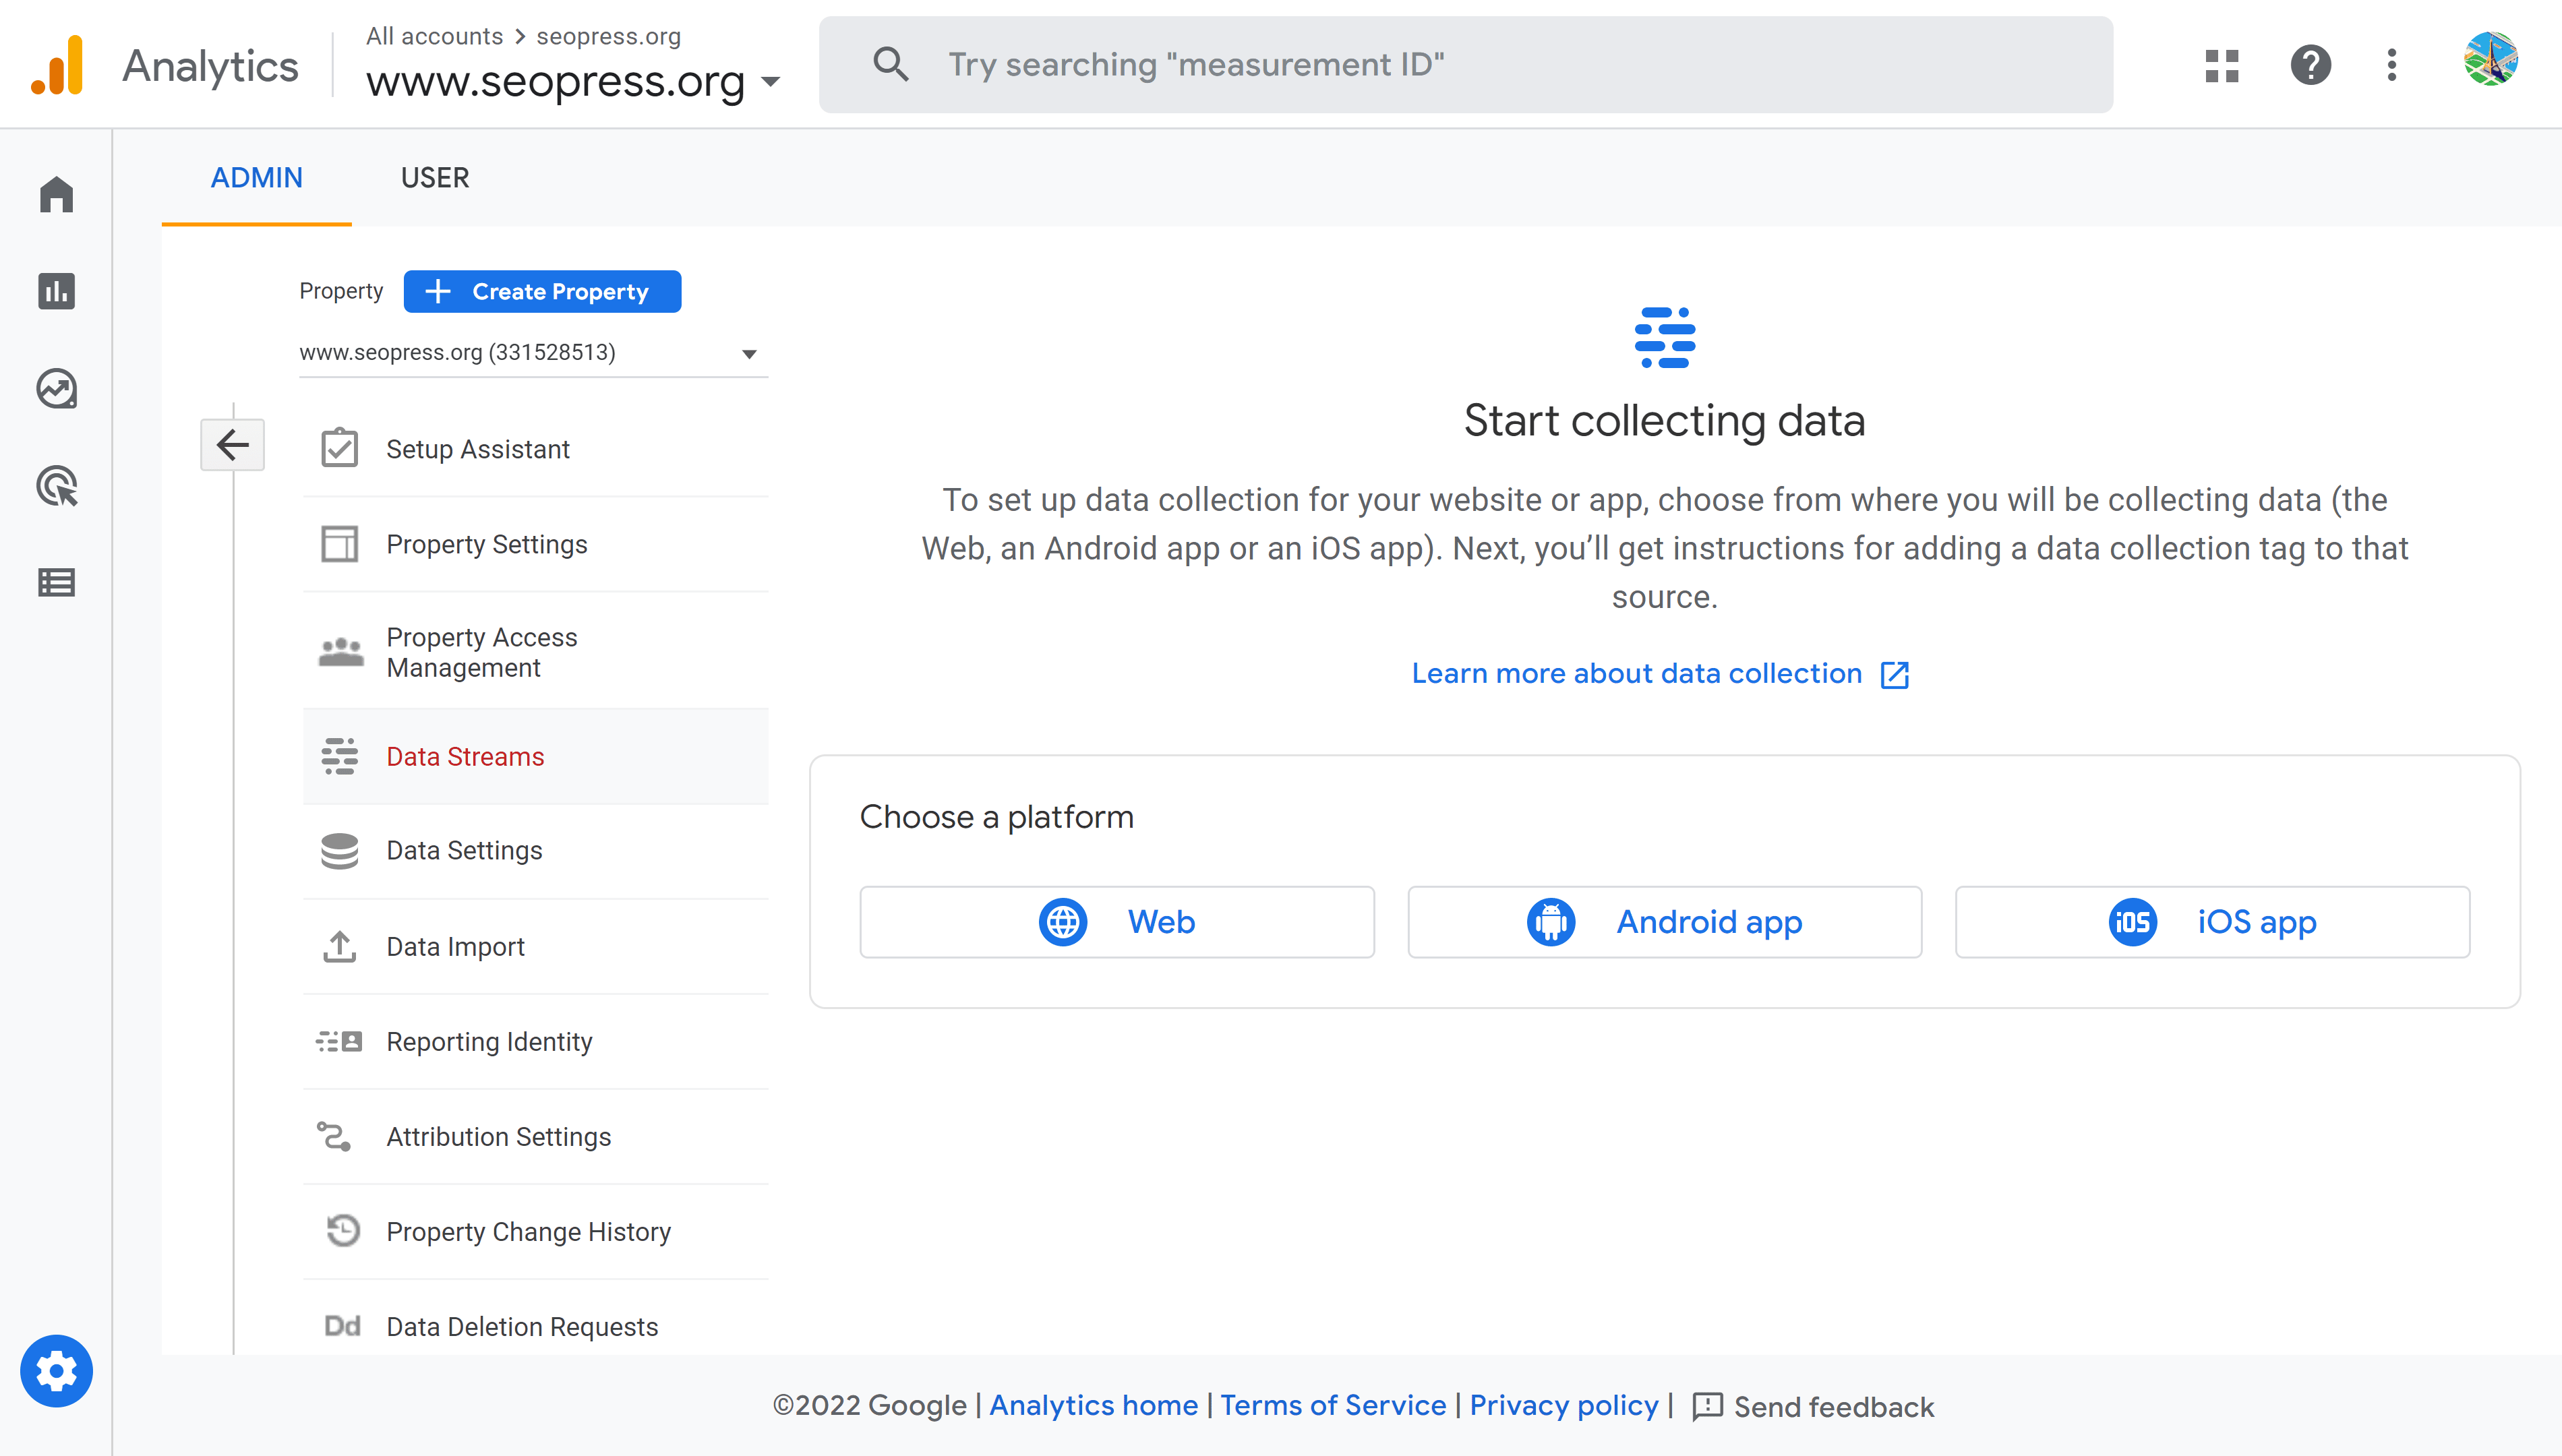
To track a website, click on the Web button after Choose a platform.
You need to give the correct address for your website and name the data stream before clicking on Create Stream.
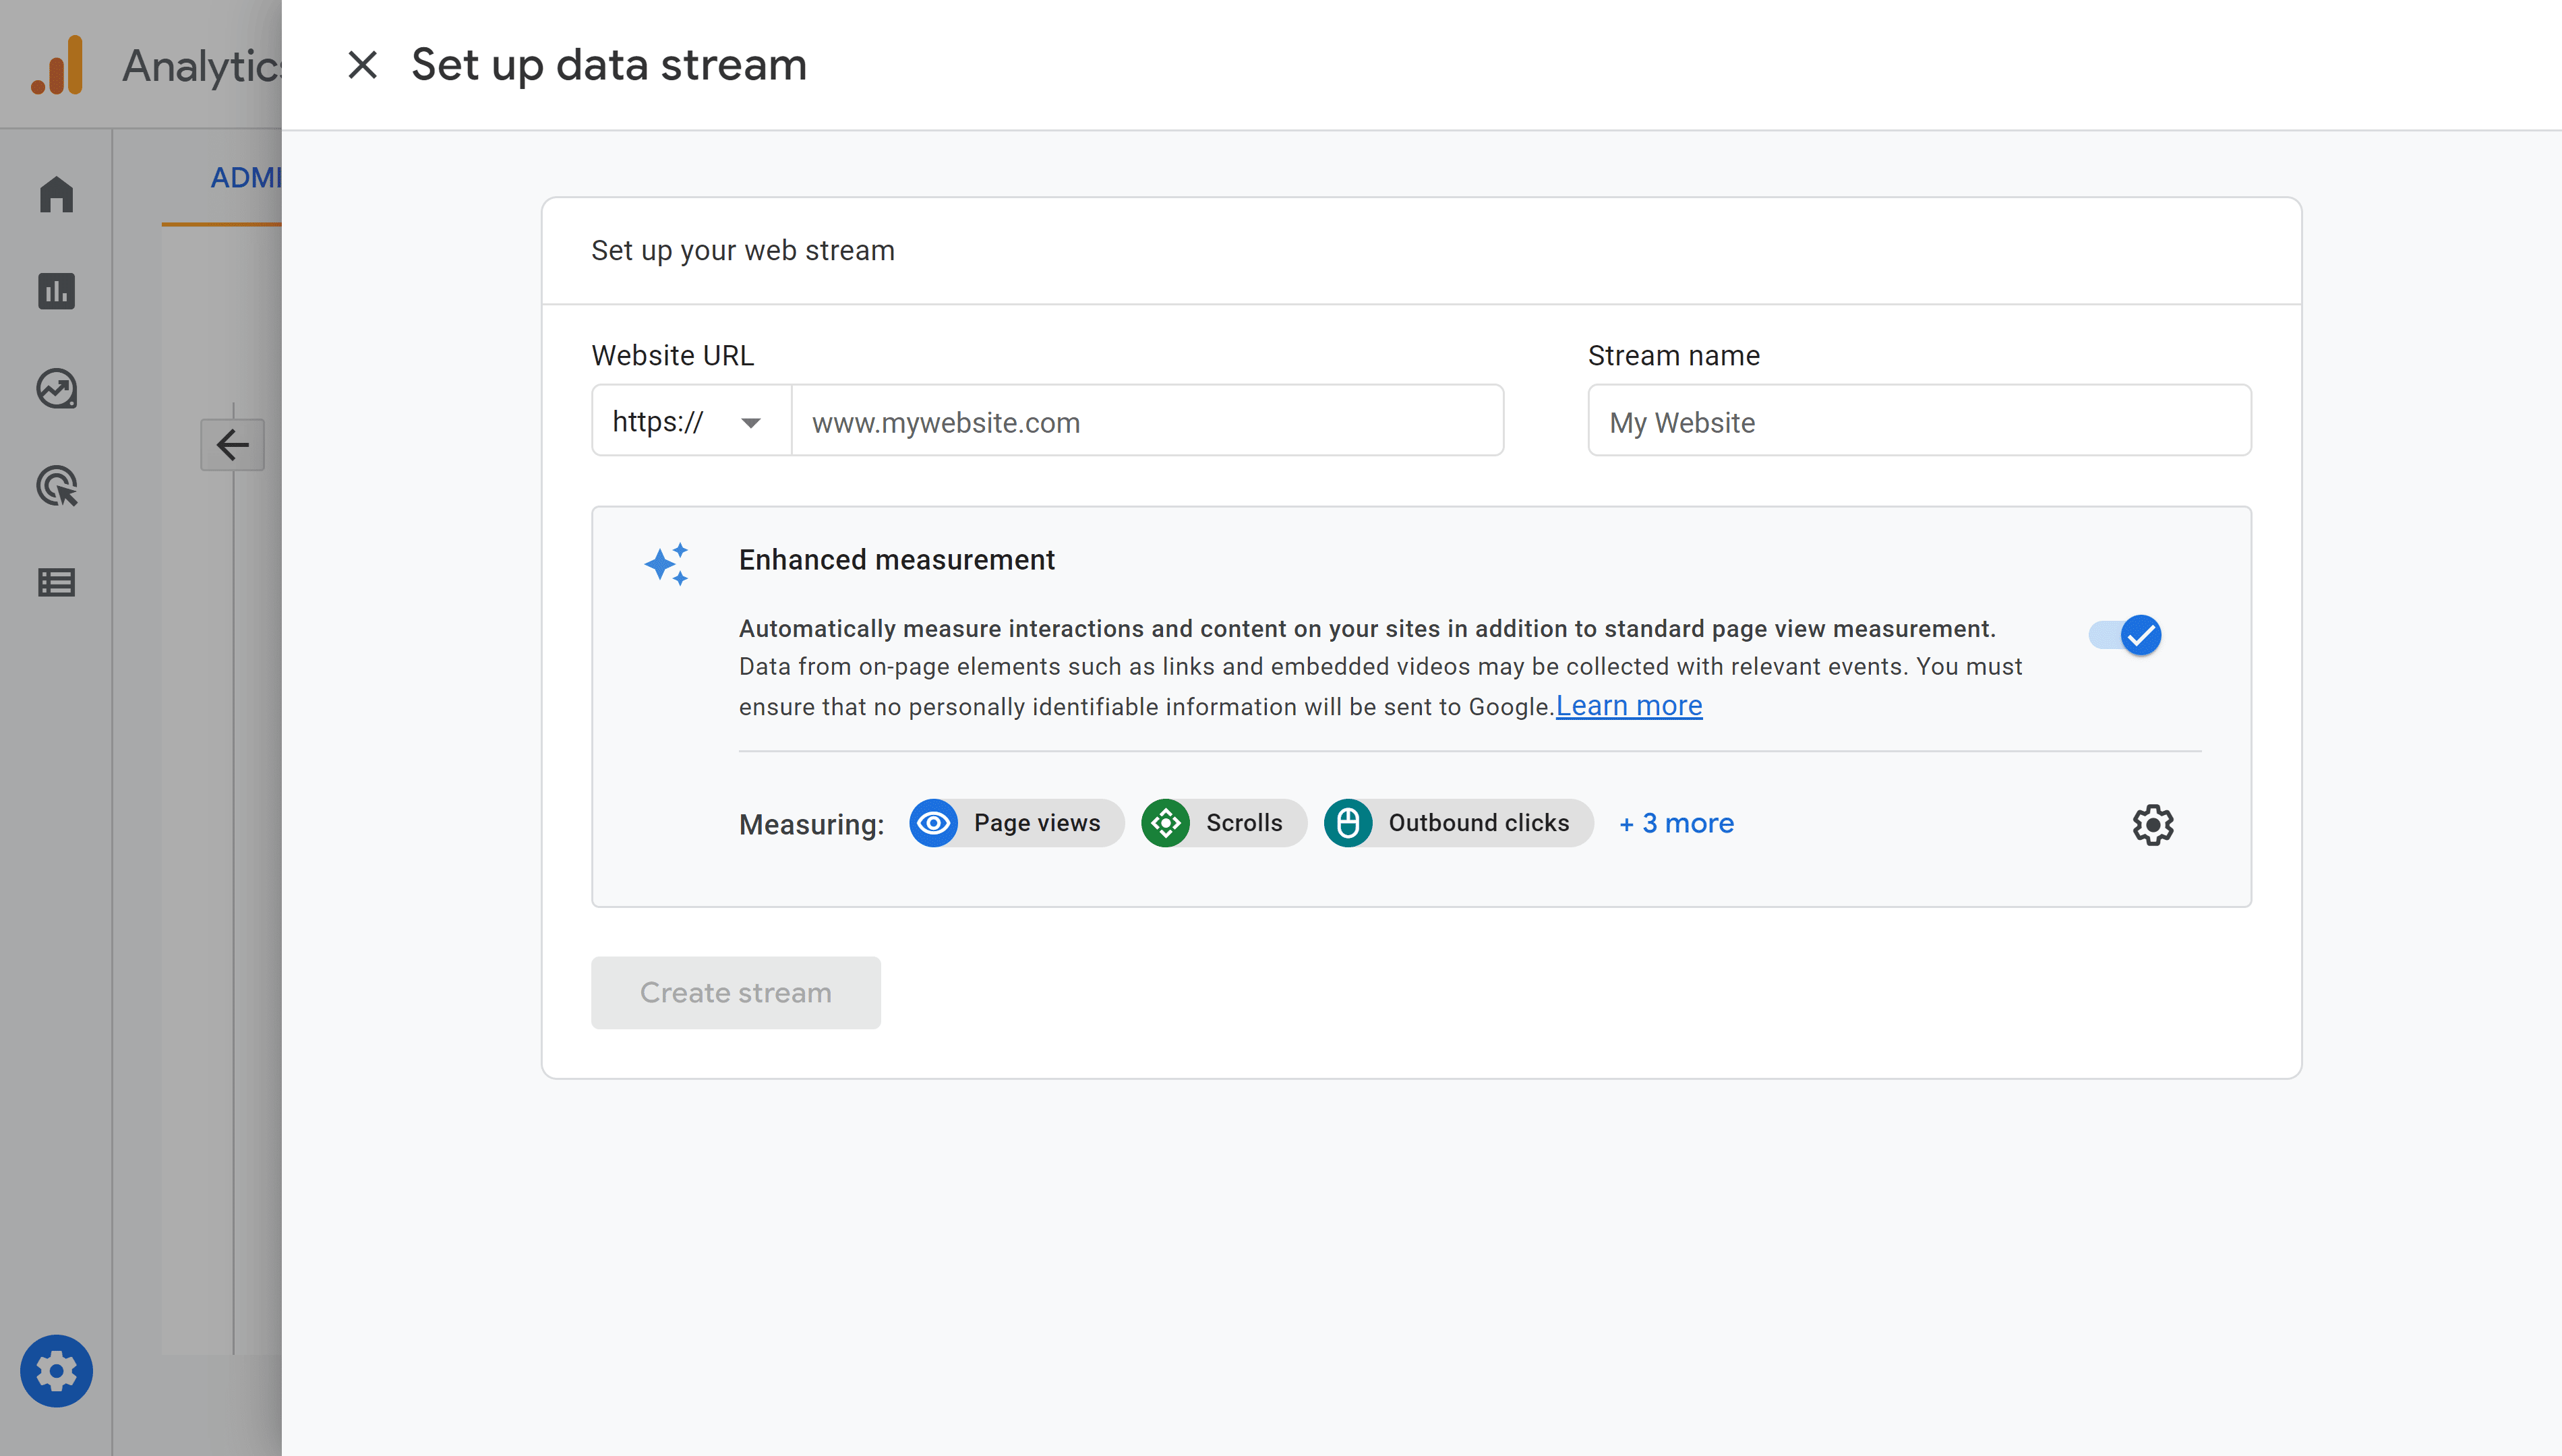
Before clicking on Create stream, it is worth noting the enhanced measurement section as it lists some of the interesting features of GA4.
As well as measuring standard page views, enhanced measurement allows you to automatically track Scrolls, Outbound links, Site search, Video engagement and file downloads. These will be shown in GA4 as events and count towards measuring user engagement.
After clicking on Create stream, you will be directed to Web stream details page which indicates that GA4 tags are not installed and gives access to installation instructions via the View tag instructions button as well as the STREAM ID and the MEASUREMENT ID associated with your stream.
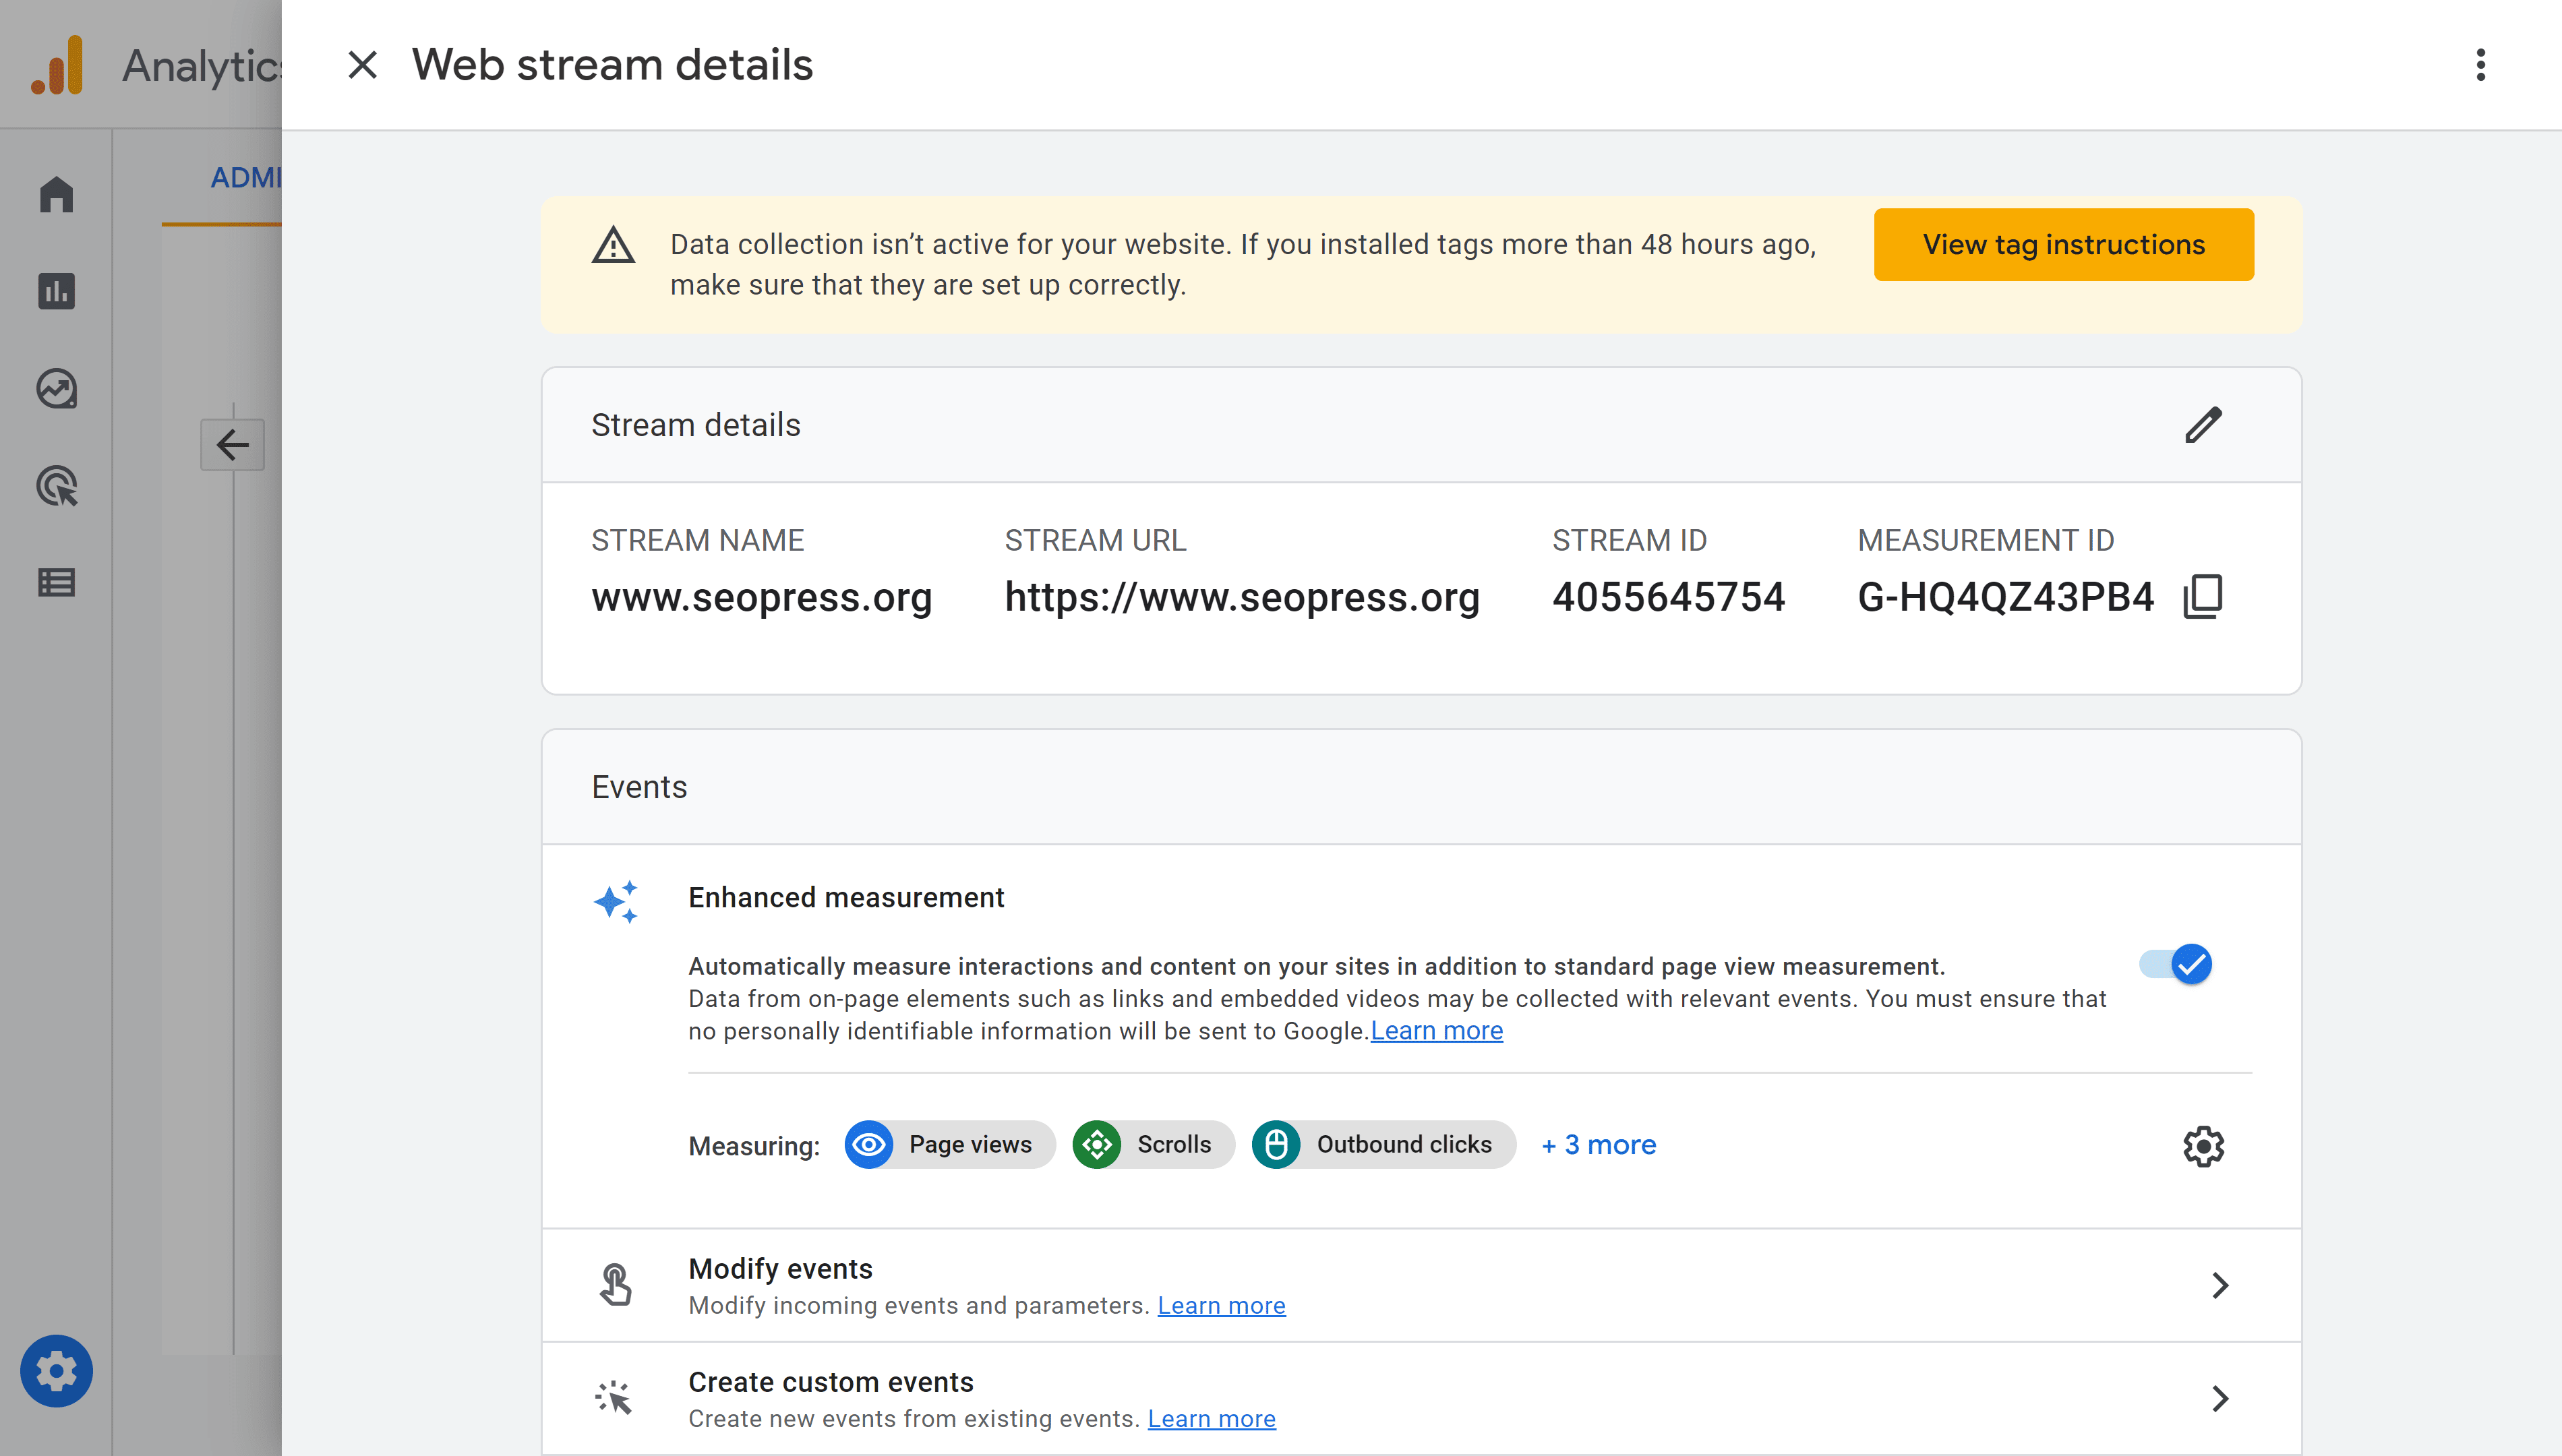
You can manually add JavaScript code to your WordPress theme, but we recommend installing the tag using a WordPress plugin. The best plugin for Google Analytics is the one you already have: SEOPress.
Installing Google Analytics on WordPress using the SEOPress plugin
As well as offering a range of SEO tools, SEOPress Free also offers features to install Google Analytics tags on WordPress sites. If you already have SEOPress installed, it makes sense to utilize this feature rather than install another plugin.
Before heading into WordPress and the SEO menu, you need to copy the GA4 Measurement ID so that you can paste it into WordPress later. In the example above, the Measurement ID is “G-HQ4QZ43PB4” – yours will be different.
If you need to return to the screen shown above to find your Measurement ID, click on the Gear icon in Google Analytics to access the Admin screen. Under the Property column of links, make sure to choose the correct property and click on Data streams. Copy the Measurement ID.
In WordPress go to SEO > Analytics > Google Analytics.
Make sure that the Analytics slider is activated, check the box Enable Google Analytics tracking and then paste the Measurement ID into the Enter your measurement ID (GA4) field.
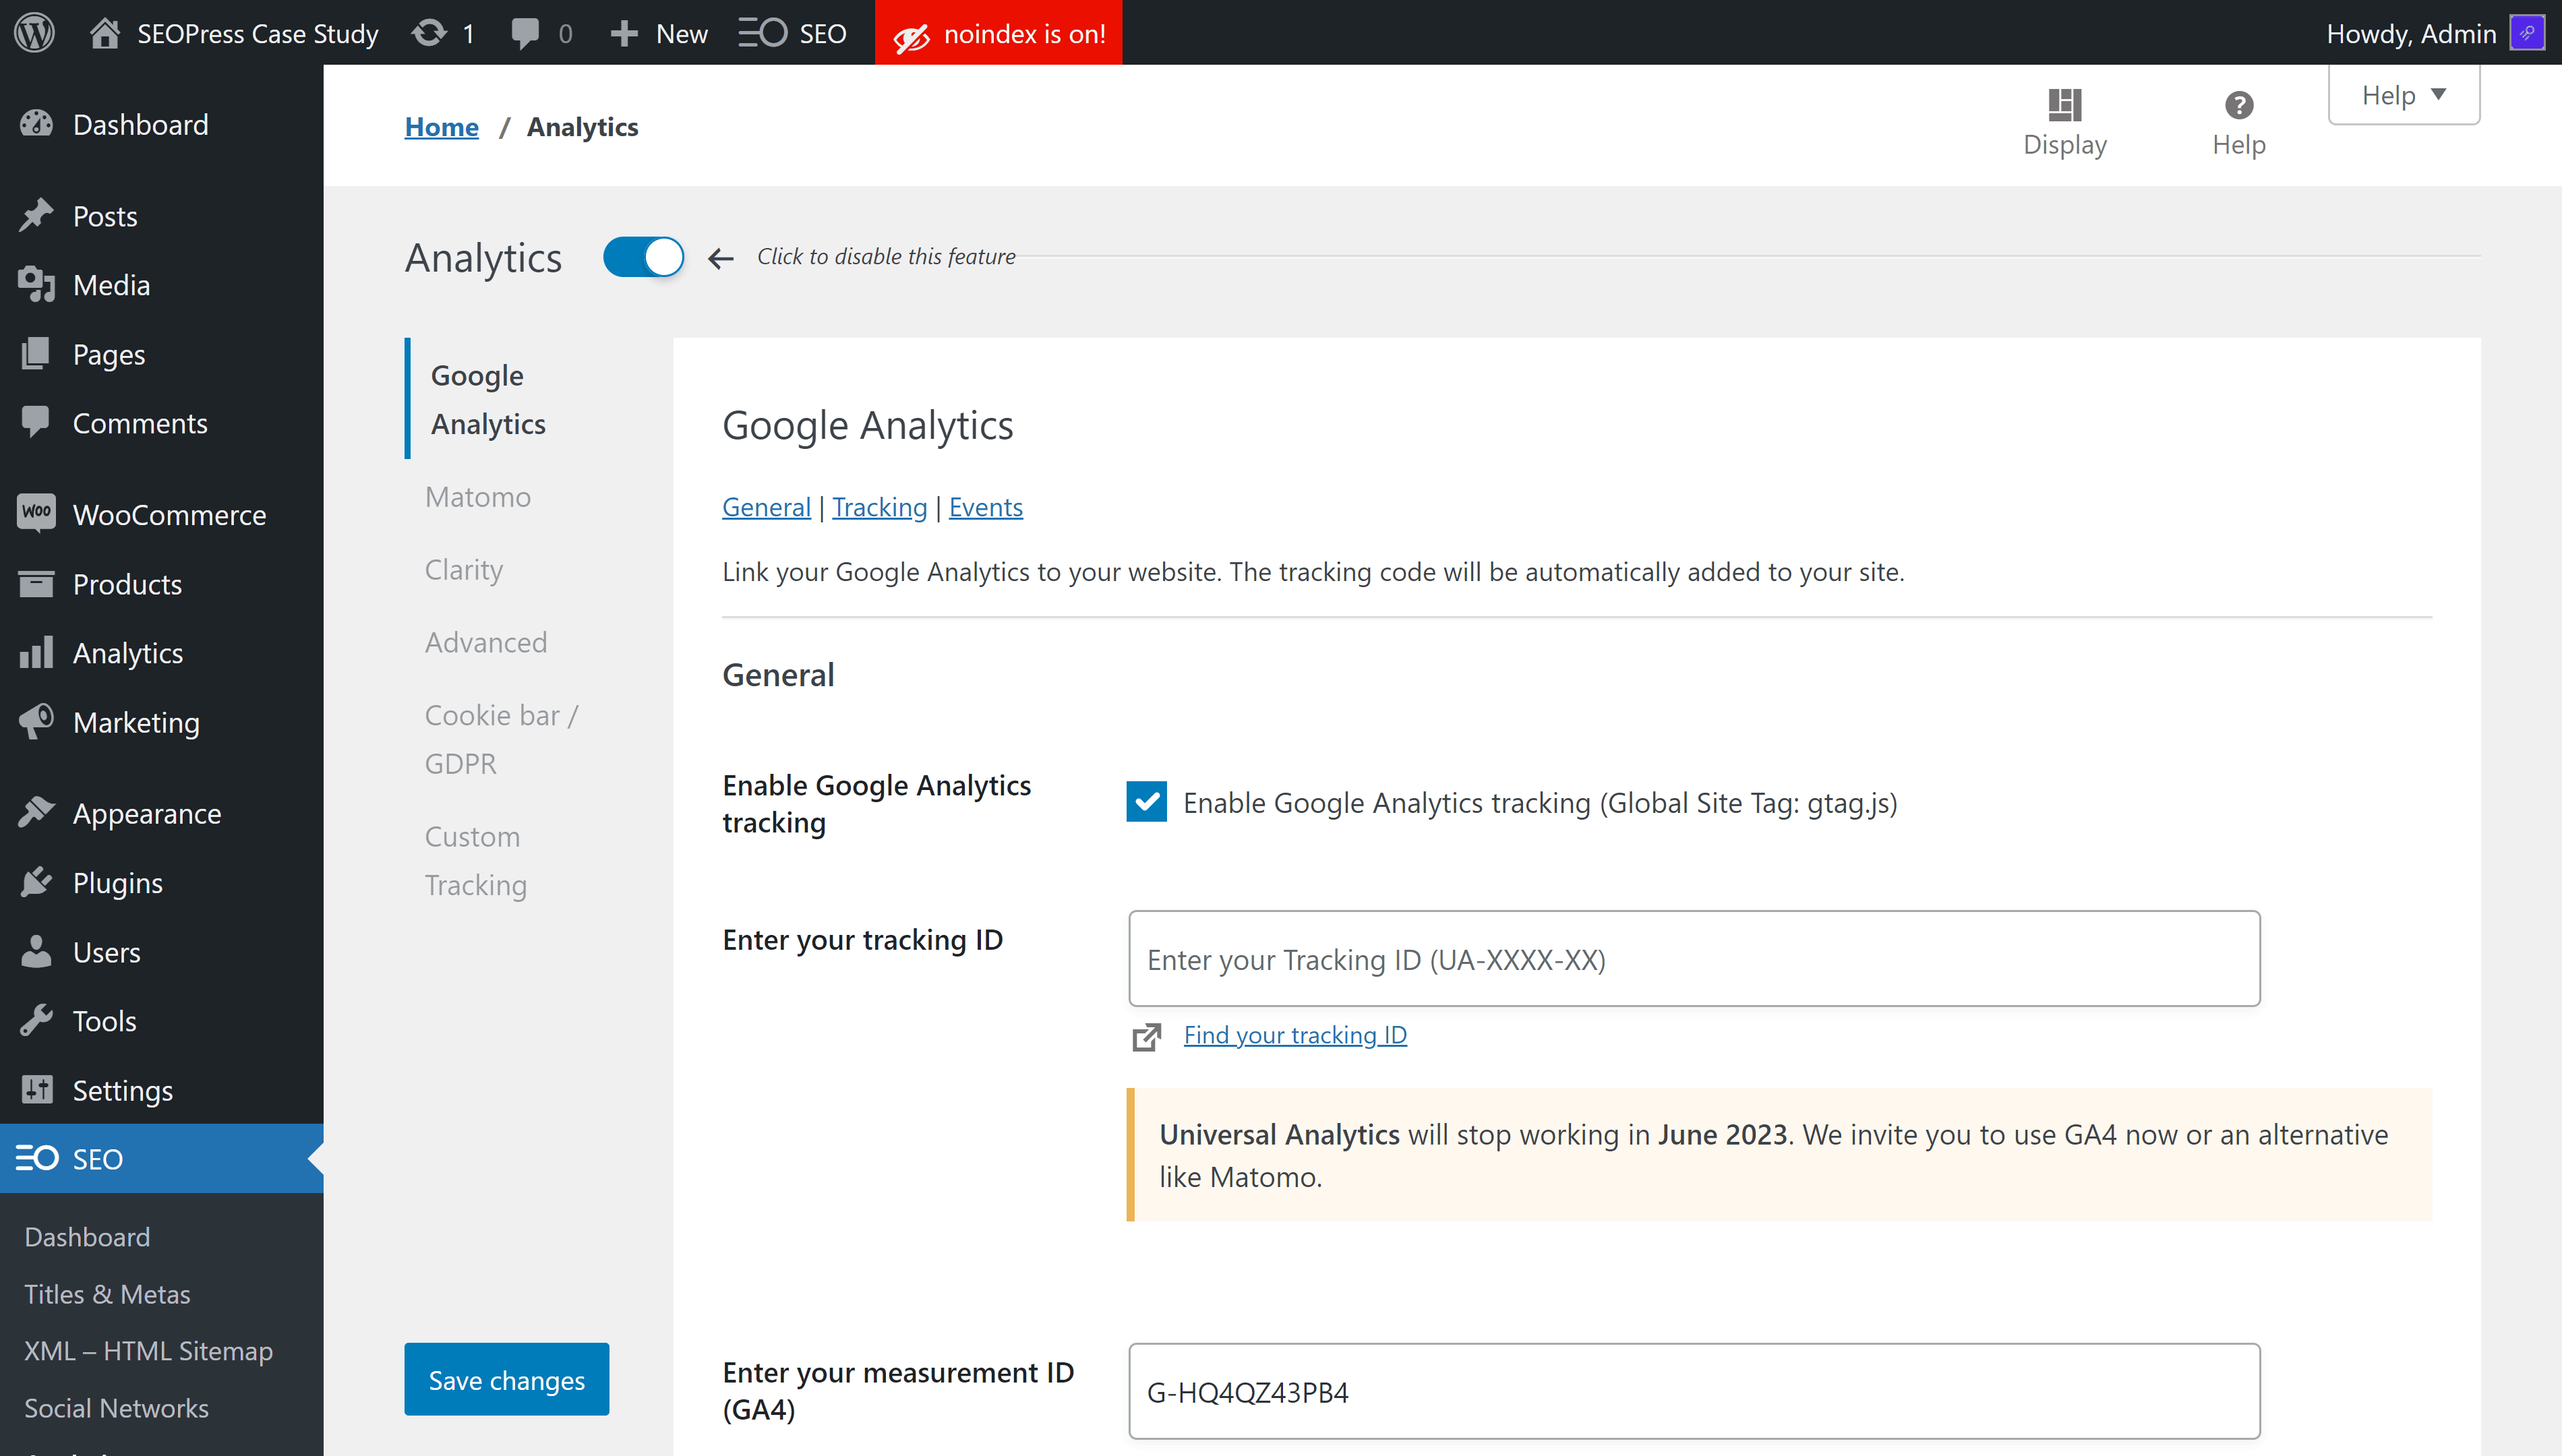
There is more to this screen, but to activate Google Analytics on your site now, you can simply click Save changes.
At the time of writing, the SEOPress Google Analytics feature supports both Google Analytics 4 and the older Universal Analytics. If you are only using GA4, you can ignore the Enter your tracking ID field. This is for Universal Analytics only.
Going back to Google Analytics, you should be able to see traffic to your site showing up in real time. Open Google Analytics and click on the Home icon.
Once the first visitors have been recorded by Google Analytics you will see the message “Your website’s data is active”. You can visit your site in another window to start collecting data.
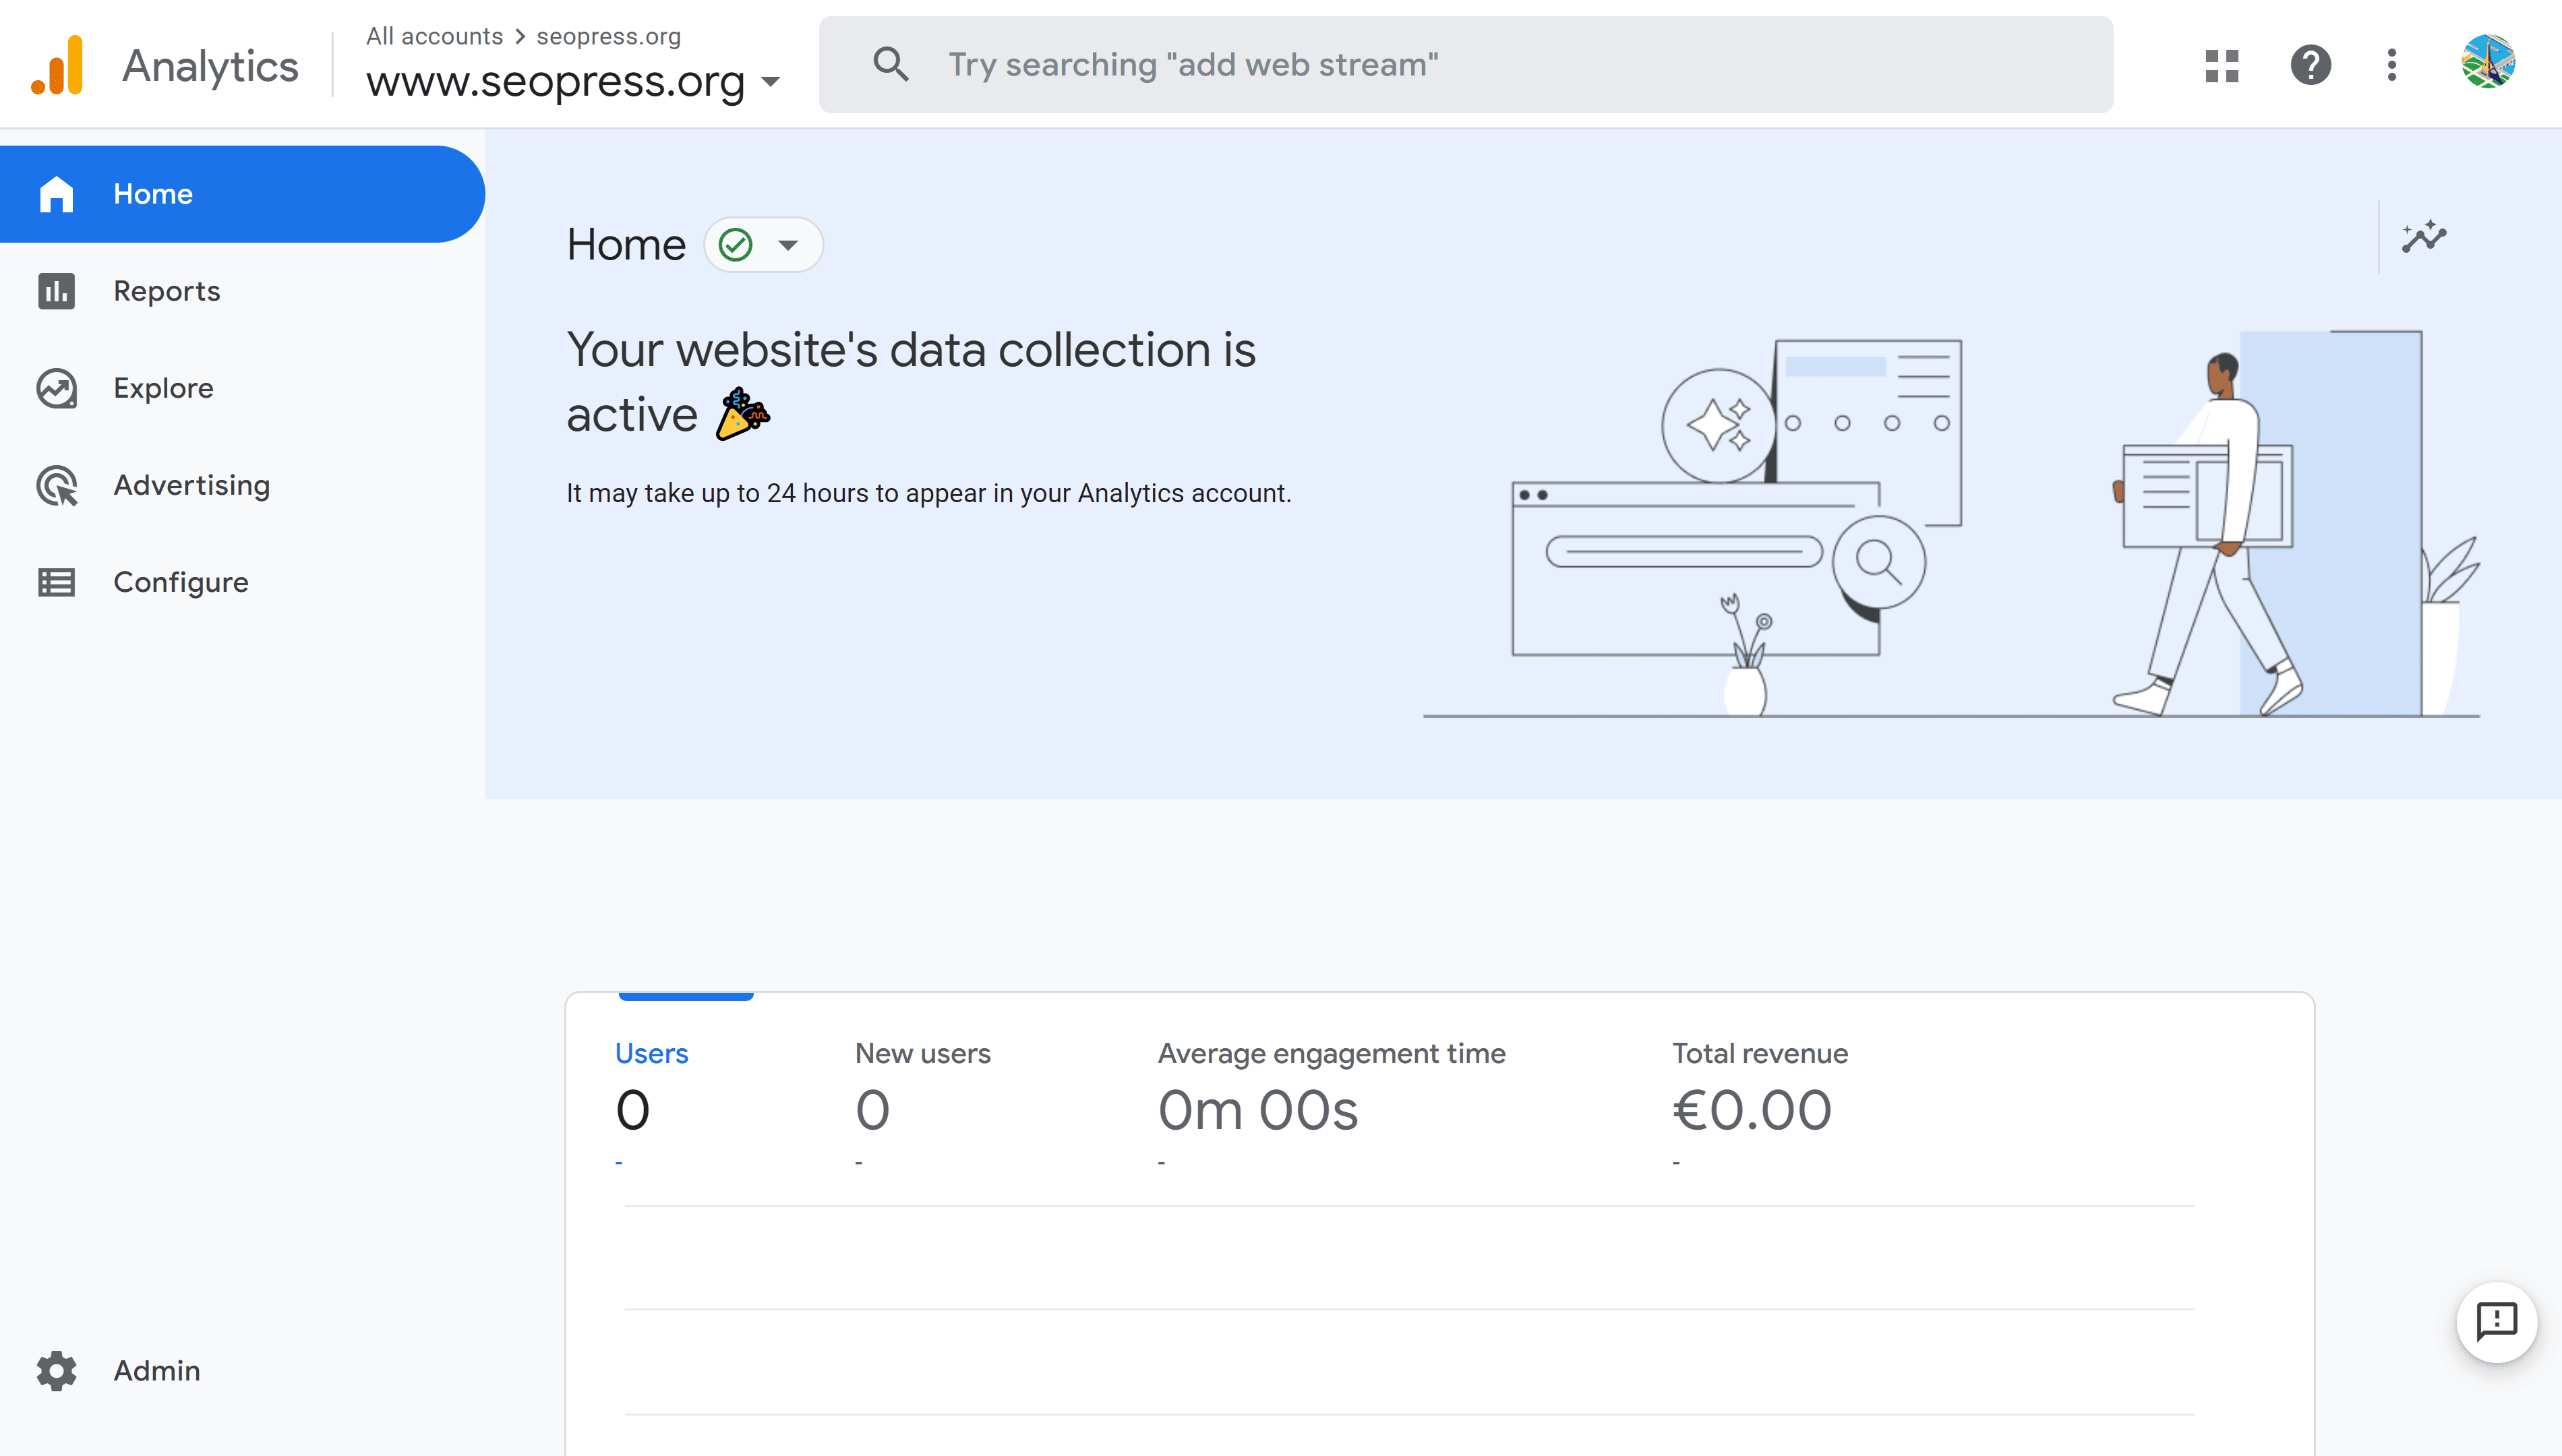
Confusingly data on Users, New Users and Average engagement time will remain 0. It may take up to 24 hours for data to start showing in the standard GA4 reports.
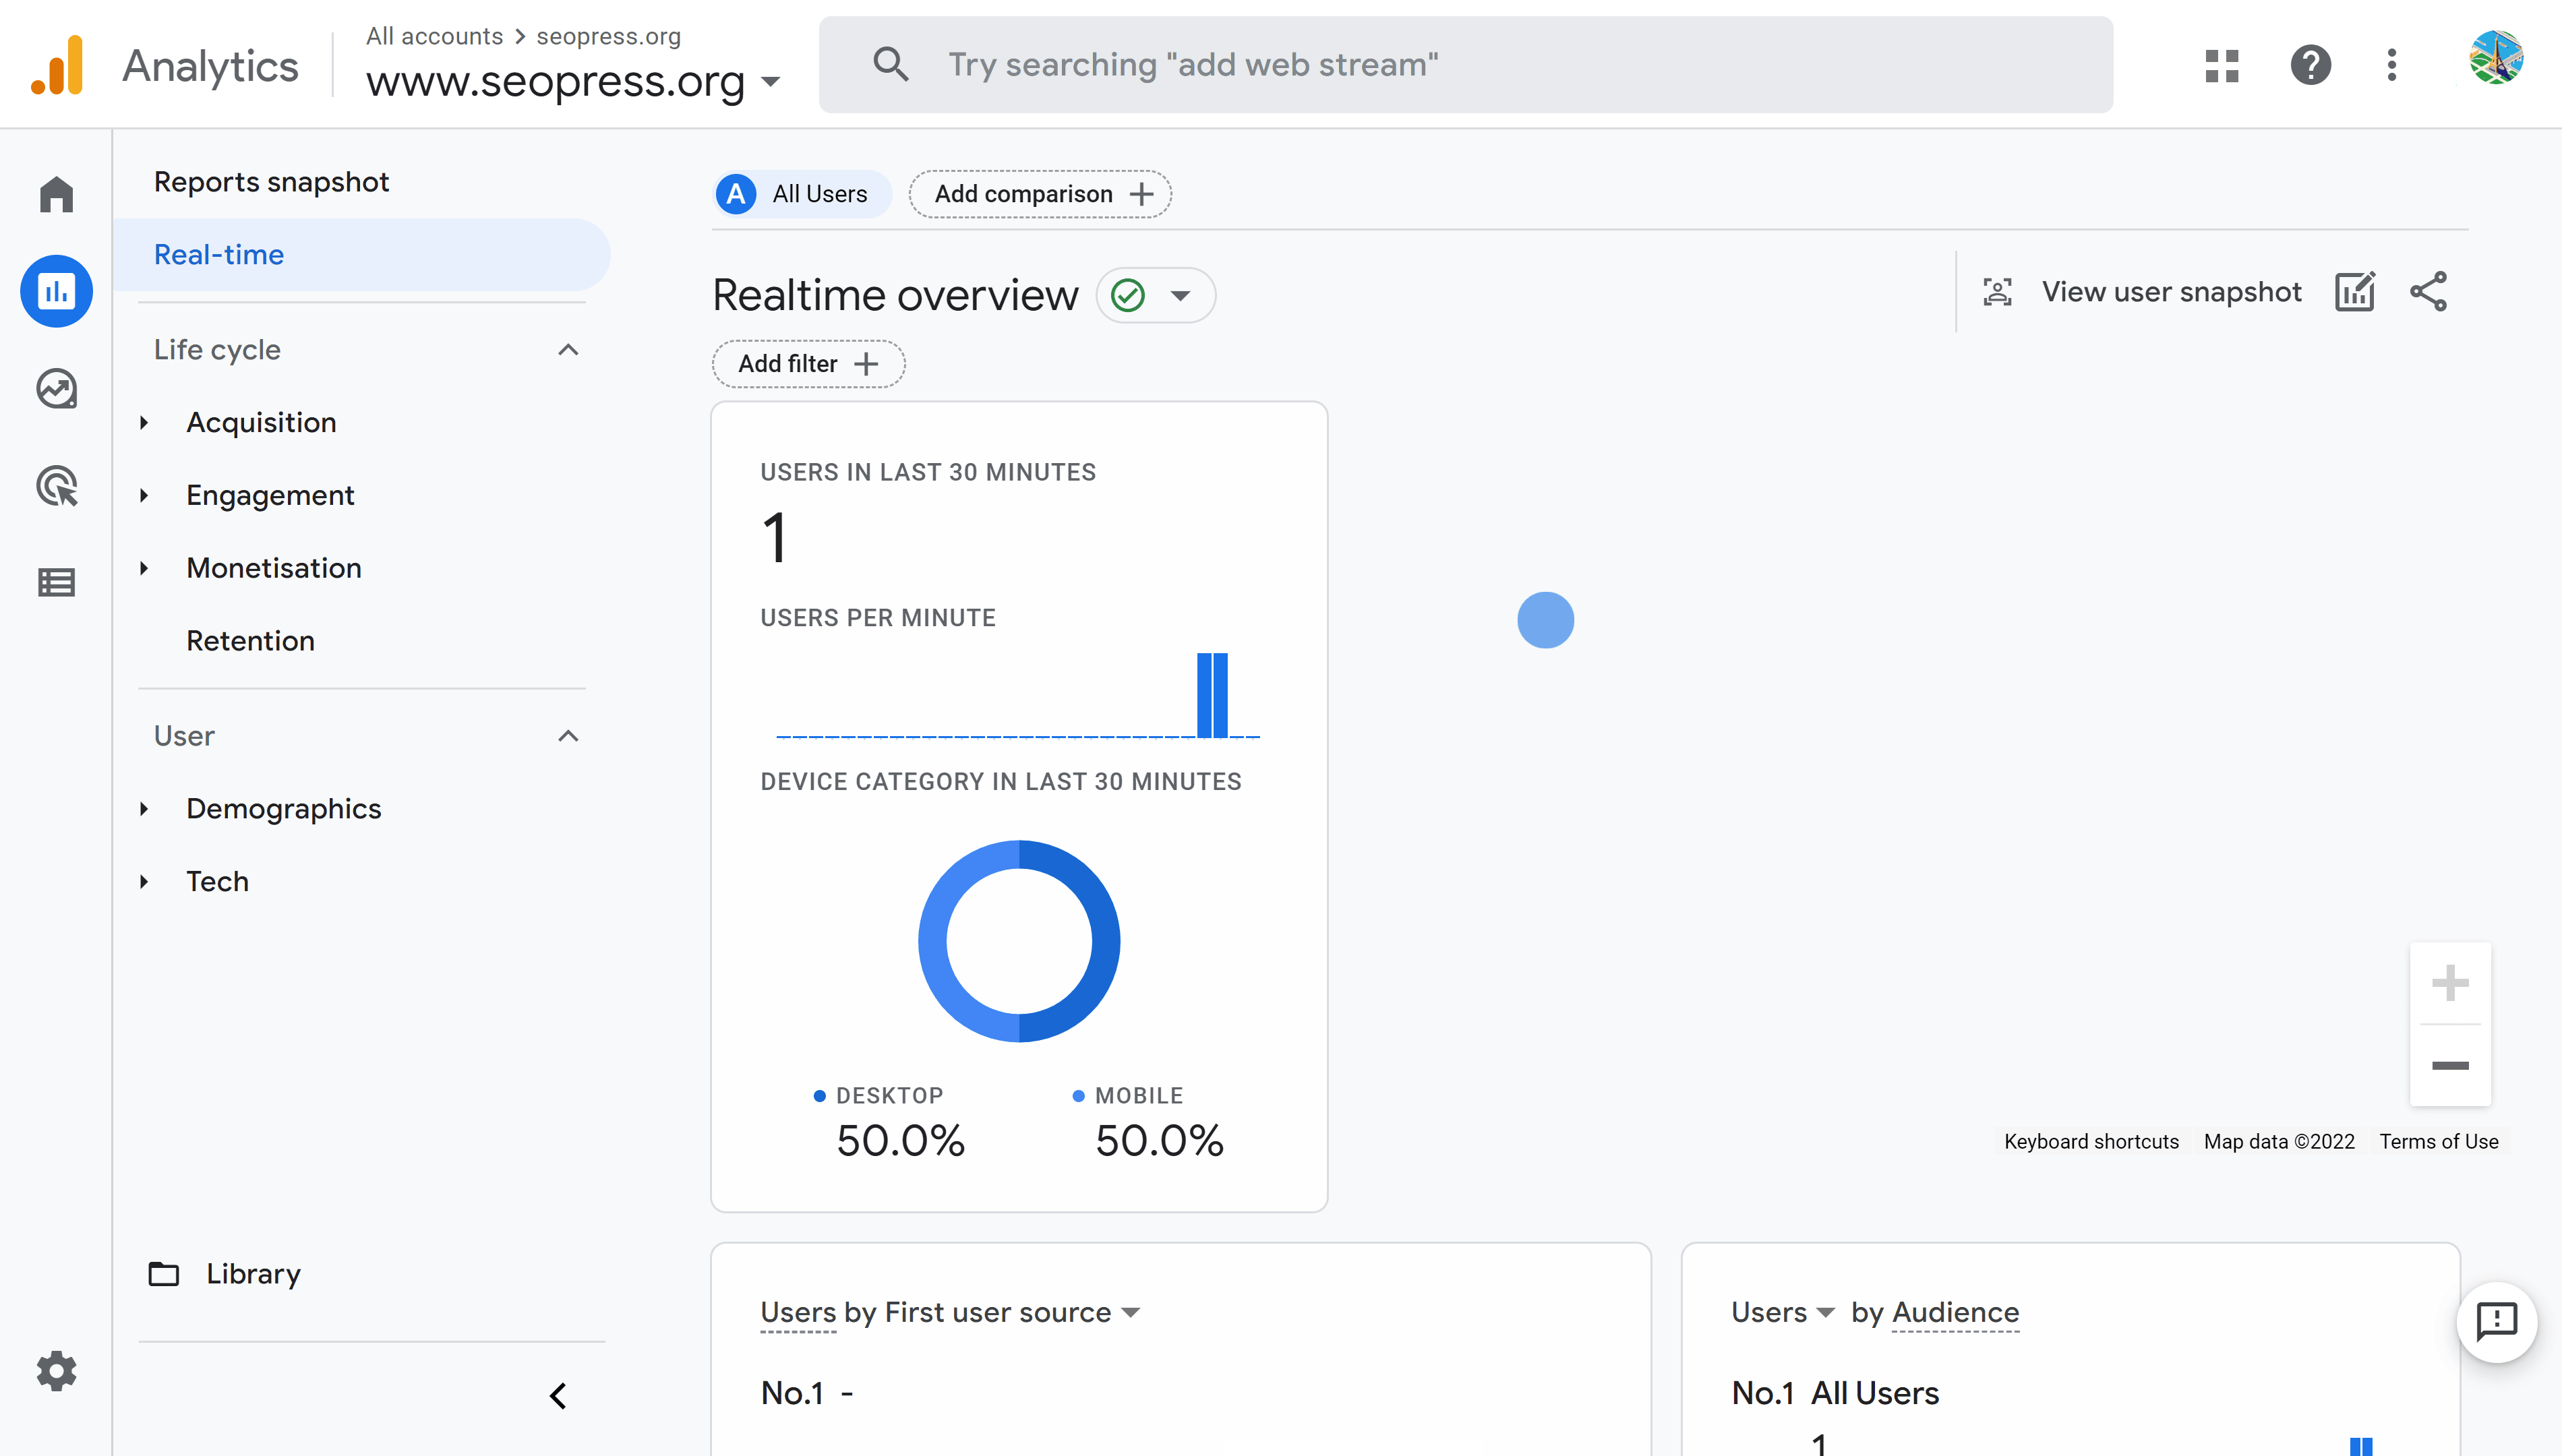
To start previewing visitor data in the first few hours after installing GA4, you can follow real-time data as it is collected. In the right-hand menu, click on Reports and then Real-time. You will see visitors and their activity on the site in real time. This may already give your first amazing insights into how users interact with your site.
Once you are sure that data is being collected, you can wait a few days and move on to our next chapter, “Getting started with Google Analytics 4”.
You will also be interested to know that it is possible to create a Google Analytics dashboard in WordPress using SEOPress. It requires creating access to the Google Analytics and Google Analytics Reporting APIs in Google Cloud Console. Full instructions are here: https://www.seopress.org/support/guides/connect-wordpress-site-google-analytics/


